
How to Use a Scorch Marker - Wood Burning for Beginners
There are a few different ways to burn woood for craft projects, let's talk about the Scorch marker, the easiest option that anyone can use.
This post may contain affiliate links, view my full disclosure policy.
There are many ways to decorate wood blanks including adding paint or vinyl. Take a look at the ornament options below for all kinds of ideas


When you choose to burn wood, through any method, you get a rich and textured look that enhances the beauty of the wood.
Wood burning methods
Let's review the different options for wood burning, there are 3 that I use regularly for my crafts.
- Wood burning tool. This is a handheld tool with various tips that plugs into an outlet. It heats up and you are able to draw on wood to burn it. I love the freeform creativity with this option, you can get really detailed and create shading with some of the tips.
- Laser engraver. This is a big step up form a wood burning tool. A laser is a larger machine that can not only engrave wood but metal, stone and more. Learn more about laser engraving and how a machine like this can fit into your craft room.
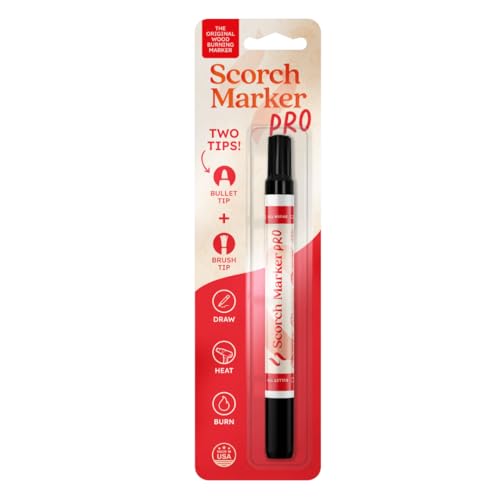
- Scorch marker. This is the easiest, and safest method for wood burning. This marker contains a chemical that reacts with heat to permanently etch wood surfaces. It's inexpensive, lasts a long time and is great for a beginner.


How does a scorch marker work?
A Scorch marker is a pen with 2 tips, a marker like tip and a sponge brush. These give you creative freedom to draw your various designs.

You can freehand a design on any wood surface, or you can use a stencil like in the project below.
Scorch marker will perform best on unfinished, bare wood. After the design is on the wood, let it dry. Then heat the area with a heat gun to permanently burn the design into the wood. The more heat you apply, the darker the design will be.
A craft heat gun will work if you have one, but a more industrial model will give you crisp dark burned lines.

A scorch marker works great on wood, but it also works with cardboard, cork, and paper. There are so many options for creative projects with this tool.
Wood burning projects
These are some of my favorite wood crafts that can be made using a Scorch marker. Create a stencil for the best results, or try making these using a freehand design.


How to make wood ornaments with a Scorch marker
Learn how to use a Scorch marker with a stencil to create a wood ornament.
Materials
- Wood slice ornament
- Removable Vinyl
- Transfer tape
- Scorch marker
Tools
- Cricut machine
- Cricut cutting mat
- Weeding tool
- Scraper tool
- Heat gun
Instructions
- Create a stencil design in Cricut Design Space.
- Cut the stencil from removable vinyl and transfer to the wood ornament.

- Prep the Scorch marker by shaking it and pumping the tip on a paper towel until the liquid starts to flow.
- Fill in the stencil with the Scorch marker until the wood darkens, don't leave any puddles.
- Let dry.
- Remove the stencil with a weeding tool.

- Use a heat gun over the wood ornament to burn the design. The hotter the heat gun, the darker your design will be. Move the gun back and forth for even distribution of heat.

- Let the ornament cool before touching it.

Optional: Add a coat of sealer like Mod Podge for shiny finish. Sealer is not necessary to protect the wood.
Notes
Be sure to watch the video for a full visual tutorial on this project.
Recommended Products
As an Amazon Associate and member of other affiliate programs, I earn from qualifying purchases.

Thanks for visiting!


